 |
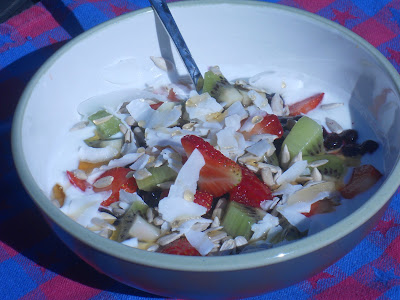
| Photo by Life as a Healthy Mom |
Oh..........and it has opened my world in knowing there are ALOT of things that I can make at home without having to buy it at the grocery store. And save money...I'm all about that, as long as it keeps with my healthy bottom line.
Take for example--- YOGURT! Seriously? I can make my own yogurt in a crockpot? I had read many years ago that it could be done, but I had to buy this electric contraption in order to make it; at it was only for yogurt. I refused to buy the $50 appliance just for the principle of it. So I continued to buy my Oikos Organic Plain Greek Yogurt for my parfaits, and Stonyfield Organic Plain Yogurt for the smoothies, ranch dressing, and dip for the kid's veggies, and recycled the plastic container. Well......not anymore (insert in the mad scientist laugh)!
I found this recipe on Pinterest for crockpot yogurt from a blog named Over at Julies, by Julie Backus. I followed her instructions on making it to the T (including setting the timer). The only thing I changed was that I used kefir, which is a fermented milk drink made with kefir grains, instead of yogurt. The yogurt I had in the fridge had pectin in it. Kefir has a little bit of a tangier taste, but it has so many more probiotic properties than regular yogurt. Next time, I will use regular yogurt or a yogurt starter to compare the difference in taste.
I also strained 1/2 of the yogurt in cheesecloth to make a thicker greek yogurt, and left the other 1/2 in it's regular state for pourable yogurt.
Here is Julie's recipe for Crockpot Yogurt:
This recipe uses a 3 quart
crock pot.
Makes
8 servings.
INGREDIENTS
2 quarts whole
milk
fresh or frozen variety of
fruit
honey or maple syrup for
sweetening yogurt and fruit
DIRECTIONS
- Pour 2 quarts of milk carefully into your crock pot bowl.
- Turn heat to low. Cover and heat milk for 2 hrs and 45 minutes. Be sure and use a timer!
- When timer goes off, turn off crock pot, keep lid on, and set timer for an additional 3 hour “cool down” time.
- After 3 hours, ladle 1 cup of the very warm, crock pot milk into a small bowl.
- To the very warm milk add ½ cup of natural, live culture, no pectin added, "plain" yogurt, like Chobani Greek Yogurt. That's your starter to produce a batch of new, live culture, yogurt. Whisk together well. Pour milk mixed with yogurt back into crock pot bowl and whisk gently to incorporate.
- Unplug crock pot. Cover with two bath towels and leave it to “culture” overnight for at least 8-12 hrs.
- In the morning, place tea towel in colander and pour yogurt into towel-lined colander placed over a large bowl. Drain off 1 to 2 cups of whey. Whey is very healthy and can be used in place of water to make homemade breads.
- Save out 1/2 cup of yogurt to use as starter for your next batch of Easy Crock Pot Yogurt. Starter should be used within a week. You may use homemade yogurt as starter 3 times before buying more natural, no pectin added, plain yogurt, like Chobani as your starter.
- Yogurt may be stored in a large jar and dished out for individual use. With small, covered, individual containers: place chopped fruit in the bottom of each container, sweetened with 1 teaspoon maple syrup or honey; add yogurt and finish off with a little drizzle of syrup or honey and snap on cover.
- Store in the refrigerator for a week. Yogurt will thicken as it cools, but you must try it before you cool it because the yogurt has such a delicate texture before it is cooled.
- Whey will last 6 months in the refrigerator.
It turned out perfect! And I felt so empowered to know I can do this stuff at home and not have to rely on yet another container of processed food! Enjoy!
No comments:
Post a Comment